Exciting news! TCMS official website is live! Offering full-stack software services including enterprise-level custom R&D, App and mini-program development, multi-system integration, AI, blockchain, and embedded development, empowering digital-intelligent transformation across industries. Visit dev.tekin.cn to discuss cooperation!
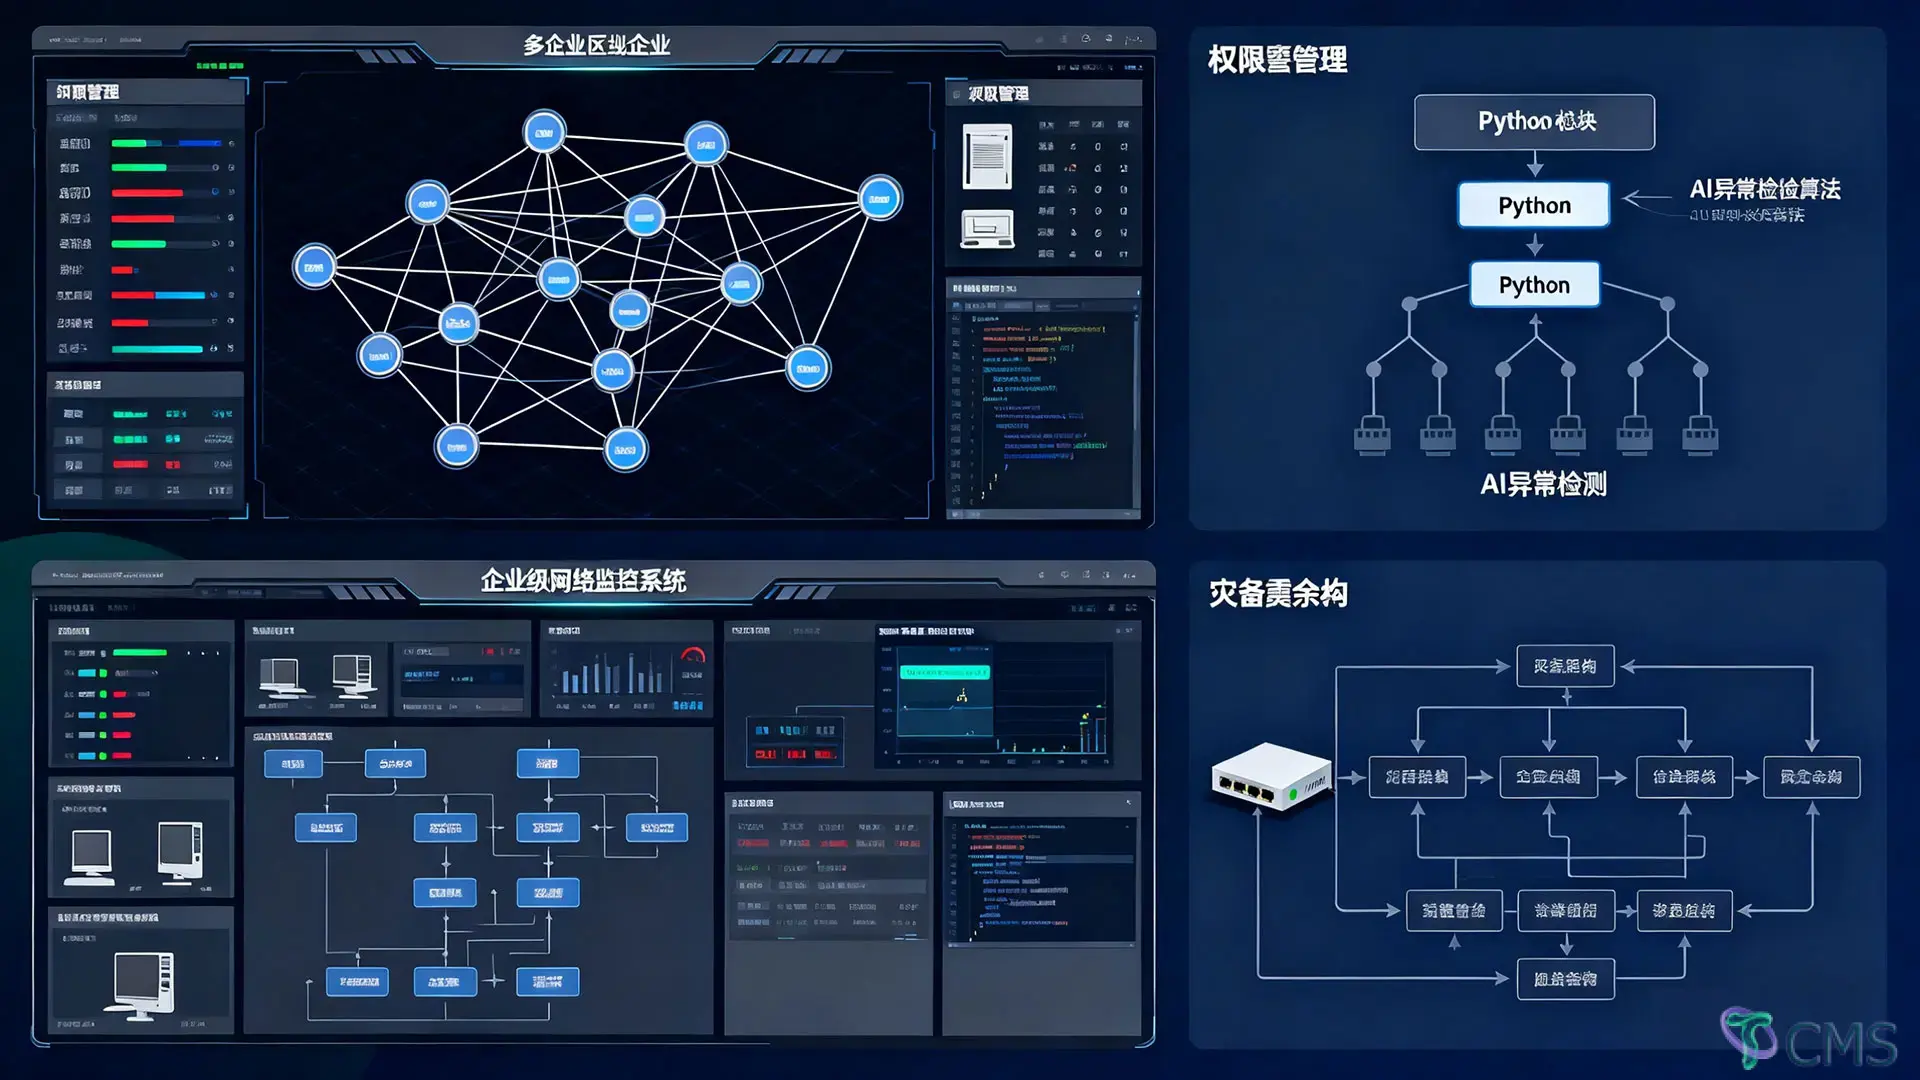
This guide demonstrates how to build a full-featured corporate network monitoring system using Python—covering device status checks, traffic statistics, port monitoring, fault alerts, and system integration. Python’s flexibility and rich libraries make it an cost-effective alternative to heavyweight commercial tools, especially for small-to-medium enterprises or teams with limited O&M budgets.
When choosing network monitoring tools, enterprises often face challenges like "redundant functions in open-source tools," "high costs of commercial software," and "difficulty in customization." Python’s features address these pain points, making it the first choice for small-to-medium enterprises and large enterprises with lightweight monitoring scenarios:
Low Threshold & High Efficiency : Python syntax is close to natural language, and its development cycle is only 1/3 that of Java or C++. Even engineers not specialized in operation and maintenance (O&M) development can quickly learn to write monitoring scripts.
Rich Professional Library Support : No need to "reinvent the wheel"— ping3 for device connectivity detection, psutil for network traffic capture, socket for port and connection monitoring, smtplib / wxpy for alert notifications, and matplotlib / pandas for data visualization—covering the entire monitoring workflow.
Cross-Platform Compatibility : A single set of code can run on Windows Server (for monitoring office area switches), Linux (for monitoring data center servers), and macOS (for local O&M debugging), eliminating the need for separate adaptations for different systems.
Lightweight Resource Footprint : Compared to open-source monitoring platforms like Zabbix and Nagios, Python scripts typically occupy less than 100MB of memory, avoiding additional load on monitored devices (such as edge routers and small switches).
Before starting development, it is essential to clarify the core monitoring objectives of the enterprise network to avoid "monitoring for the sake of monitoring." Combining O&M scenarios of most companies, core requirements can be categorized into three types:
| Monitoring Dimension | Core Objective | Typical Scenarios |
|---|---|---|
| Device Status | Ensure core network devices (routers, switches, servers) are online and functioning properly | Data center router outage causing company-wide network failure; core server downtime leading to unavailable business systems |
| Network Traffic | Real-time statistics on bandwidth usage and identification of abnormal traffic (e.g., P2P downloads, malicious attacks) | Employees’ excessive downloads occupying bandwidth, resulting in slow customer access to the company website; abnormal upload traffic indicating potential data leaks |
| Connections & Ports | Monitor the status of critical ports (e.g., 80/443 for web services, 3306 for databases) and identify unauthorized connections | Frequent scanning of database ports by external IPs; unauthorized devices accessing the internal LAN |
| Fault Alerts | Notify O&M personnel immediately when network anomalies occur to shorten fault troubleshooting time | A switch failure at 2 AM remains undetected until work hours, causing 3 hours of business interruption |
The following breaks down the system implementation process from four core modules— device monitoring → traffic statistics → connection monitoring → fault alerts —with practical code and scenarios.
Batch detect the online status of internal network devices (e.g., router 192.168.1.1, server 192.168.1.100, printer 192.168.1.200). Mark failures and record timestamps if devices go offline.
Use the ping3 library (easier to integrate into Python scripts than the system’s built-in ping command, supporting timeout settings and TTL configuration) with multi-threading for fast batch device detection (avoiding long wait times with single-threaded sequential detection).
import ping3
import threading
from datetime import datetime
# 1. Define the list of devices to monitor (can be read from config files/databases to avoid hardcoding)
devices = [
{"name": "Core Router", "ip": "192.168.1.1"},
{"name": "Web Server", "ip": "192.168.1.100"},
{"name": "Finance Printer", "ip": "192.168.1.200"}
]
# 2. Single device detection function
def check_device_status(device):
name = device["name"]
ip = device["ip"]
# Set timeout to 2 seconds (prevent prolonged waiting)
response_time = ping3.ping(ip, timeout=2)
current_time = datetime.now().strftime("%Y-%m-%d %H:%M:%S")
if response_time is not None:
status = "Online"
print(f"[{current_time}] {name}({ip}) - {status}, Response Time: {response_time:.2f}ms")
else:
status = "Offline"
print(f"[{current_time}] {name}({ip}) - {status}!!!")
# Call the alert function (Module 4 below) to trigger offline alerts
send_alert(f"Device Offline Alert", f"{name}({ip}) was detected offline at {current_time}. Please troubleshoot promptly.")
# 3. Multi-threaded batch detection (improve efficiency for monitoring 10+ devices simultaneously)
def batch_check_devices():
threads = []
for device in devices:
t = threading.Thread(target=check_device_status, args=(device,))
threads.append(t)
t.start()
# Wait for all threads to complete execution
for t in threads:
t.join()
# Test execution
if __name__ == "__main__":
batch_check_devices()Avoid "False Alerts" : A single failed ping may result from network fluctuations. Add logic like "mark as offline only after 3 consecutive failed detections";
Configurable Management : Store the device list in a devices.json file. No code modifications are needed when adding devices later. Example:
[{"name": "Core Router", "ip": "192.168.1.1"}, {"name": "Web Server", "ip": "192.168.1.100"}]Read it in code using json.load(open("devices.json")) .
Real-time statistics on upload/download speeds of specified network interfaces (e.g., eth0 for servers, wan port for office routers). Trigger alerts if traffic exceeds thresholds (e.g., download speed > 10MB/s for 5 consecutive minutes).
Use the psutil library (cross-platform system resource retrieval, supporting traffic statistics for Windows "Ethernet" and Linux "eth0" interfaces).
import psutil
import time
from datetime import datetime
# 1. Get real-time traffic of a specified interface (unit: bytes)
def get_interface_traffic(interface="eth0"):
net_io = psutil.net_io_counters(pernic=True).get(interface)
if not net_io:
raise ValueError(f"Network interface not found: {interface}. Please check the interface name.")
# Return uploaded bytes and downloaded bytes
return net_io.bytes_sent, net_io.bytes_recv
# 2. Calculate traffic speed (unit: MB/s)
def calculate_speed(interface, interval=1):
# Get traffic 1 second ago
sent_before, recv_before = get_interface_traffic(interface)
time.sleep(interval)
# Get current traffic
sent_after, recv_after = get_interface_traffic(interface)
# Calculate speed (1MB = 1024*1024 bytes)
upload_speed = (sent_after - sent_before) / (1024 * 1024)
download_speed = (recv_after - recv_before) / (1024 * 1024)
return round(upload_speed, 2), round(download_speed, 2)
# 3. Continuously monitor traffic and check threshold violations
def monitor_traffic(interface="eth0", max_download=10):
while True:
upload, download = calculate_speed(interface)
current_time = datetime.now().strftime("%Y-%m-%d %H:%M:%S")
print(f"[{current_time}] {interface} - Upload: {upload}MB/s, Download: {download}MB/s")
# Trigger alert if download speed exceeds the threshold
if download > max_download:
alert_msg = f"Traffic Exceeded Alert\nInterface: {interface}\nTime: {current_time}\nDownload Speed: {download}MB/s (Threshold: {max_download}MB/s)"
send_alert("Traffic Over Limit", alert_msg)
# Monitor every 5 seconds (adjustable based on needs)
time.sleep(5)
# Test execution (Linux example; for Windows, replace with interface name like "Ethernet")
if __name__ == "__main__":
monitor_traffic(interface="eth0", max_download=10)For office networks: Set "alert if download speed > 5MB/s during working hours" to prevent employees from using company bandwidth to download videos;
For web servers: Monitor "alert if WAN port upload speed > 2MB/s" to check for abnormal data uploads (e.g., data leaks).
Monitor whether critical ports (e.g., 3306 for databases, 3389 for remote desktops) are open. Trigger alerts if ports are closed;
Count connections to specified ports (e.g., concurrent connections to port 80 of web servers) and identify abnormal connections (e.g., frequent connections from a single IP may indicate an attack).
socket library: Detect port availability and establish TCP connections;
psutil.net_connections() : Retrieve all network connection information and filter connections to specified ports.
import socket
import psutil
from datetime import datetime
# 1. Check if a specified IP:port is open
def check_port(ip, port, timeout=2):
sock = socket.socket(socket.AF_INET, socket.SOCK_STREAM)
sock.settimeout(timeout)
try:
sock.connect((ip, port))
sock.close()
return True # Port is open
except:
return False # Port is closed
# 2. Monitor the status of critical ports
def monitor_ports(port_list):
while True:
current_time = datetime.now().strftime("%Y-%m-%d %H:%M:%S")
for ip, port in port_list:
is_open = check_port(ip, port)
status = "Open" if is_open else "Closed"
print(f"[{current_time}] {ip}:{port} - {status}")
if not is_open:
alert_msg = f"Port Abnormality Alert\nIP:Port: {ip}:{port}\nTime: {current_time}\nStatus: {status} (Expected: Open)"
send_alert("Port Anomaly", alert_msg)
time.sleep(10) # Check every 10 seconds
# 3. Count connections to a specified port (e.g., port 80)
def count_port_connections(port):
connections = psutil.net_connections(kind="tcp")
port_connections = [conn for conn in connections if conn.laddr.port == port and conn.status == "ESTABLISHED"]
# Return connection count and list of connected IPs
ip_list = [conn.raddr.ip for conn in port_connections if conn.raddr]
return len(port_connections), ip_list
# 4. Monitor port connections and identify abnormal IPs
def monitor_port_connections(port=80, max_conn=100, max_ip_conn=20):
while True:
conn_count, ip_list = count_port_connections(port)
current_time = datetime.now().strftime("%Y-%m-%d %H:%M:%S")
print(f"[{current_time}] Port {port} - Concurrent Connections: {conn_count}")
# Trigger alert if connection count exceeds the threshold
if conn_count > max_conn:
alert_msg = f"Port Connection Limit Exceeded Alert\nPort: {port}\nTime: {current_time}\nConnection Count: {conn_count} (Threshold: {max_conn})"
send_alert("Port Connections Over Limit", alert_msg)
# Count connections per IP; alert if exceeding threshold (e.g., 20 connections from one IP)
ip_conn_count = {}
for ip in ip_list:
ip_conn_count[ip] = ip_conn_count.get(ip, 0) + 1
for ip, count in ip_conn_count.items():
if count > max_ip_conn:
alert_msg = f"Abnormal IP Connection Alert\nPort: {port}\nIP: {ip}\nTime: {current_time}\nConnection Count: {count} (Threshold: {max_ip_conn})"
send_alert("Abnormal IP Connections", alert_msg)
time.sleep(5)
# Test execution (monitor database port 3306 and web server port 80)
if __name__ == "__main__":
# Monitor critical port status
critical_ports = [("192.168.1.100", 3306), ("192.168.1.101", 80)]
monitor_ports(critical_ports)
# Monitor port 80 connections (run in a separate thread to avoid blocking)
# import threading
# threading.Thread(target=monitor_port_connections, args=(80, 100, 20)).start()A key value of monitoring systems is "timely notifications during anomalies." Without alerts, monitoring is like "having a fire alarm that doesn’t ring." Common alert methods include email, WeChat Work/DingTalk, and SMS (requiring third-party API integration). Below is an implementation example using WeChat Work Robot Alerts (low threshold, free, and suitable for team collaboration).
import requests
import json
from datetime import datetime

# WeChat Work Robot WebHook (create a robot in WeChat Work to get the link)
WECHAT_WEBHOOK = "https://qyapi.weixin.qq.com/cgi-bin/webhook/send?key=your_robot_key"

def send_alert(title, content):
    """Send alerts via WeChat Work"""
    # Construct alert message (supports Markdown for better readability)
    msg = {
"msgtype": "markdown",
"markdown": {
"content": f"### {title}\n{content}\n\n**Alert Time**: {datetime.now().strftime('%Y-%m-%d %H:%M:%S')}"
}
    }
    try:
response = requests.post(WECHAT_WEBHOOK, data=json.dumps(msg), headers={"Content-Type": "application/json"})
if response.json().get("errcode") == 0:
print(f"Alert sent successfully: {title}")
else:
print(f"Alert failed to send: {response.text}")
    except Exception as e:
print(f"Exception occurred while sending alert: {str(e)}")Tiered Alerts : For critical faults (e.g., core server downtime), send alerts via email + WeChat Work + SMS; for minor faults (e.g., printer offline), only send WeChat Work alerts;
Avoid "Alert Spam" : Set a rule like "only one alert per fault (e.g., device offline) within 10 minutes" to prevent frequent notifications from disturbing O&M teams.
Individual module scripts only solve partial problems. A complete system requires integration with scheduled tasks, data storage, and visualization , plus performance optimization.
Use the APScheduler library to implement scheduled tasks (more flexible than time.sleep() , supporting cron expressions, interval execution, and scheduled time execution).
from apscheduler.schedulers.blocking import BlockingScheduler
# 1. Define all monitoring tasks
def run_all_monitors():
# Task 1: Check device status every 1 minute
scheduler.add_job(batch_check_devices, "interval", minutes=1, id="device_check")
# Task 2: Monitor traffic every 5 seconds
scheduler.add_job(monitor_traffic, "interval", seconds=5, id="traffic_monitor", args=("eth0", 10))
# Task 3: Check critical ports every 10 seconds
critical_ports = [("192.168.1.100", 3306), ("192.168.1.101", 80)]
scheduler.add_job(monitor_ports, "interval", seconds=10, id="port_check", args=(critical_ports,))
# Task 4: Monitor port 80 connections every 5 seconds
scheduler.add_job(monitor_port_connections, "interval", seconds=5, id="conn_monitor", args=(80, 100, 20))
# 2. Start the scheduler
if __name__ == "__main__":
scheduler = BlockingScheduler()
run_all_monitors()
print("Monitoring system started. Running continuously...")
try:
scheduler.start()
except (KeyboardInterrupt, SystemExit):
print("Monitoring system stopped manually.")
except Exception as e:
print(f"Monitoring system crashed: {str(e)}. Restarting...")
# Optional: Add auto-restart logic for production environments
run_all_monitors()
scheduler.start()For long-term O&M, storing monitoring data (e.g., daily traffic peaks, device offline records) helps analyze trends and optimize networks. A lightweight option is to use SQLite (no server required, file-based) or MySQL for larger-scale deployments. Below is an example of storing traffic data with SQLite:
import sqlite3
from datetime import datetime
# 1. Initialize database and table
def init_db(db_name="network_monitor.db"):
conn = sqlite3.connect(db_name)
cursor = conn.cursor()
# Create traffic statistics table
cursor.execute('''
CREATE TABLE IF NOT EXISTS traffic (
id INTEGER PRIMARY KEY AUTOINCREMENT,
interface TEXT NOT NULL,
upload_speed REAL NOT NULL,
download_speed REAL NOT NULL,
record_time TEXT NOT NULL
)
''')
conn.commit()
conn.close()
# 2. Insert traffic data into the database
def insert_traffic_data(interface, upload, download, db_name="network_monitor.db"):
record_time = datetime.now().strftime("%Y-%m-%d %H:%M:%S")
conn = sqlite3.connect(db_name)
cursor = conn.cursor()
cursor.execute('''
INSERT INTO traffic (interface, upload_speed, download_speed, record_time)
VALUES (?, ?, ?, ?)
''', (interface, upload, download, record_time))
conn.commit()
conn.close()
# 3. Modify the monitor_traffic function to include data storage
def monitor_traffic(interface="eth0", max_download=10):
init_db() # Ensure database and table exist
while True:
upload, download = calculate_speed(interface)
current_time = datetime.now().strftime("%Y-%m-%d %H:%M:%S")
print(f"[{current_time}] {interface} - Upload: {upload}MB/s, Download: {download}MB/s")
# Insert data into database
insert_traffic_data(interface, upload, download)
# Trigger alert if threshold is exceeded
if download > max_download:
alert_msg = f"Traffic Exceeded Alert\nInterface: {interface}\nTime: {current_time}\nDownload Speed: {download}MB/s (Threshold: {max_download}MB/s)"
send_alert("Traffic Over Limit", alert_msg)
time.sleep(5)Raw data is hard to interpret—visualization tools like matplotlib or Plotly can turn historical traffic, device status, and connection counts into charts. Below is an example of plotting 24-hour traffic trends with matplotlib :
import sqlite3
import matplotlib.pyplot as plt
import matplotlib.dates as mdates
from datetime import datetime
# 1. Query 24-hour traffic data for a specified interface
def get_24h_traffic(interface, db_name="network_monitor.db"):
conn = sqlite3.connect(db_name)
cursor = conn.cursor()
# Calculate time 24 hours ago
twenty_four_hours_ago = (datetime.now() - timedelta(hours=24)).strftime("%Y-%m-%d %H:%M:%S")
cursor.execute('''
SELECT record_time, upload_speed, download_speed
FROM traffic
WHERE interface = ? AND record_time >= ?
ORDER BY record_time ASC
''', (interface, twenty_four_hours_ago))
data = cursor.fetchall()
conn.close()
# Format data for plotting
times = [datetime.strptime(row[0], "%Y-%m-%d %H:%M:%S") for row in data]
uploads = [row[1] for row in data]
downloads = [row[2] for row in data]
return times, uploads, downloads
# 2. Plot 24-hour traffic trend chart
def plot_24h_traffic(interface="eth0"):
times, uploads, downloads = get_24h_traffic(interface)
plt.figure(figsize=(12, 6))
plt.plot(times, uploads, label="Upload Speed (MB/s)", color="blue")
plt.plot(times, downloads, label="Download Speed (MB/s)", color="red")
# Format chart
plt.xlabel("Time")
plt.ylabel("Speed (MB/s)")
plt.title(f"24-Hour Network Traffic Trend - {interface}")
plt.legend()
plt.grid(True, linestyle="--", alpha=0.7)
# Rotate x-axis labels for readability
plt.xticks(rotation=45)
# Format x-axis to show hours
plt.gca().xaxis.set_major_formatter(mdates.DateFormatter("%H:%M"))
plt.gca().xaxis.set_major_locator(mdates.HourLocator(interval=2))
# Save or display the chart
plt.tight_layout()
plt.savefig(f"{interface}_24h_traffic.png")
plt.close()
print(f"24-hour traffic chart saved as {interface}_24h_traffic.png")To turn the script into a production-ready system, consider the following adjustments:
Linux : Use systemd to create a service (e.g., network-monitor.service ) so the system starts automatically on boot:
[Unit]
Description=Python Network Monitoring Service
After=network.target
[Service]
User=root # Use a non-root user for security in production
ExecStart=/usr/bin/python3 /path/to/monitor_system.py
Restart=always # Restart if the service crashes
[Install]
WantedBy=multi-user.targetEnable and start the service with:
sudo systemctl enable network-monitor
sudo systemctl start network-monitor
Windows : Use "Task Scheduler" to create a task that runs the script at startup (select "Run whether user is logged on or not").
Replace print() with Python’s built-in logging module to record detailed logs (e.g., errors, alerts, status updates) to a file:
import logging
# Configure logging
logging.basicConfig(
level=logging.INFO,
format="%(asctime)s - %(levelname)s - %(message)s",
handlers=[
logging.FileHandler("network_monitor.log"), # Write to file
logging.StreamHandler() # Also print to console
]
)
# Use logging instead of print
logging.info(f"[{current_time}] {interface} - Upload: {upload}MB/s, Download: {download}MB/s")
logging.error(f"Failed to send alert: {str(e)}")Limit Permissions : Run the script with a non-root user (avoid unnecessary privileges);
Encrypt Credentials : If using services like email or WeChat Work, store API keys/credentials in environment variables (not hardcoded in scripts);
Whitelist IPs : Restrict database access (e.g., SQLite file permissions, MySQL IP whitelisting) to prevent unauthorized modifications.
This guide demonstrates how to build a full-featured corporate network monitoring system using Python—covering device status checks, traffic statistics, port monitoring, fault alerts, and system integration. Python’s flexibility and rich libraries make it an cost-effective alternative to heavyweight commercial tools, especially for small-to-medium enterprises or teams with limited O&M budgets.
For future enhancements, consider:
AI-Powered Anomaly Detection : Use machine learning (e.g., scikit-learn ) to train models on historical data, enabling proactive identification of abnormal traffic or device behavior (e.g., predicting router failures based on temperature trends);
Web Dashboard : Integrate with Flask or Django to build a web-based dashboard, allowing O&M teams to view real-time data and charts from any device;
Multi-Region Monitoring : Extend the system to monitor cloud resources (e.g., AWS EC2 instances, Azure VMs) using their official Python SDKs, creating a unified monitoring platform for on-premises and cloud networks.

May 03, 2025


May 03, 2025


Please enter your email address below and click the subscribe button. By doing so, you agree to our Terms and Conditions.